
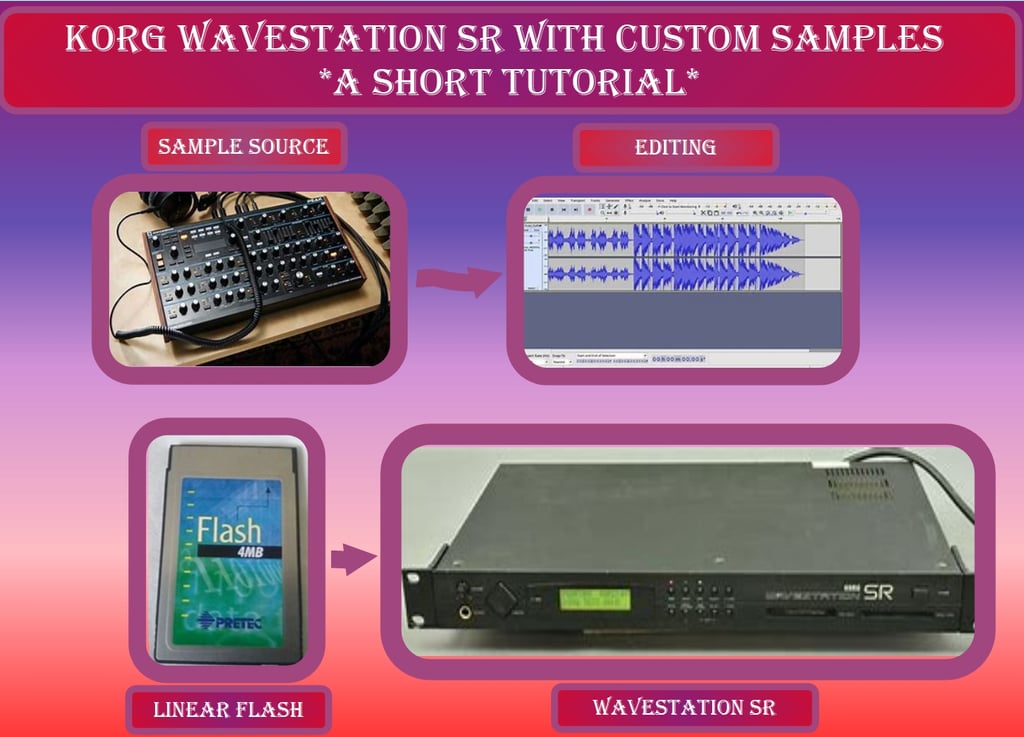
Wavestation SR with Custom samples
I finally got round to loading custom samples onto a Korg Wavestation SR synthesizer. Also managed to do a short video of the process.
Korg Wavestation SR how to load custom samples
I've been wanting to load multiple custom samples onto a Korg Wavestation SR synthesizer for a while. I tried it with one sample ages ago just to see if it would work, but didn't have enough time to try it out with multiple samples until recently.
I like the Wavestation SR as it has a lot of sounds and waves already included (more than the Wavestation and the Wavestation A/D). This was one reason that I got it in the first place. After getting one, I had a quick search on the web for manuals etc, and also stumbled upon the fact that you may be able to load custom samples from a custom PCMCIA card. I found the information initially on the Wavestation Frequently Asked Questions section of the www.danphillips.com/wavestation/ws_faq.htm website. It looked very interesting, so I thought I'd have a go (and I did have most of the kit lying around to do it). One of the main problems was finding software called MCE (memory card explorer) by Elan, Luckily I knew someone who had a copy from working in the Automotive trade. If anyone is interested, I will make this available on my product page along with the other files that are required (possibly for a very small fee). The sample process is quite involved, but after sorting it out once it isn't too bad.
Note: A lot of people seem to dislike the Wavestation SR for the following reasons.
1) No joystick for vector manipulation -- However this is easy to control via an external midi controller. CC messages 16 and 17 adjust the vectors.
2) Hard to program through the on module screen -- Yes it is fiddly, but not too bad when you get used to it. Although I can never remember what I did when I go back to it. There are some very good free editors available such as Edisyn (GitHub - eclab/edisyn: Synthesizer Patch Editor) and I think CTRLR may have one as well.
I personally think that the ability to load your own samples, along with the number of patches and waveforms included with the SR make it a very viable synth option. I know you could get a VST to do some of this, but I like working with stand-alone hardware if I can.
Korg Wavestation SR custom samples Useful links
When I initially started looking into this, and also after I'd managed to load some samples onto the Wavestation SR, I found some useful website links.
www.danphillips.com/wavestation/index.htm Probably one of the best links for the Wavestation SR. Note the link doesn't seem to work anymore for PCM Card Workshop, but the following one should. web.archive.org/web/20030501131910/members.aol.com/wrkshppcm/
There is also some other very good stuff on the MATRIXSYNTH site. www.matrixsynth.com/2008/10/pcm-card-workshop-for-korg-wavestation.html and www.matrixsynth.com/2024/01/priming-pcmcia-sram-cards-for-korg.html
www.soundonsound.com/techniques/korg-wavestation-tips-techniques
The process
Anyway, I will try and list the key points of how I managed to get some custom samples onto my Wavestation SR. There is also a video on YouTube outlining the process (I'll link it at the bottom). You can probably get all the software you need (apart from MCE perhaps) by investigating the links on this page. However, I will also make them available as a pack including MCE, for a small fee on my products page.... if anyone is interested. Also if you don't fancy going through the process yourselves I may be able to set up a programming service, if you can provide your required samples and a suitable card, I could load it for you and check on my SR ... again if anyone is interested let me know.
What will you need to load the cards
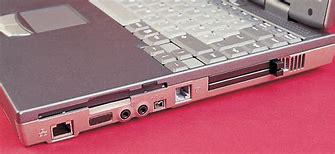
1) An old Windows XP laptop with an internal PCMCIA card reader / writer
Notes: You can get PCMCIA USB card readers but these wont generally work for linear flash cards. USB based card readers for linear flash cards are generally very expensive. The cheapest option is to go for an old laptop.
The software for the sample conversion and writing process (PCM Card Workshop and Memory Card Explorer) will only work on XP (95/ 98 2000 ?). I tried them on 10 and 11 with no luck but they may work through a virtual machine. Not really any good for the writing hardware though.
I did try and run the software under Linux using Wine and that did seem to work for PCM Card workshop. I couldn't get MCE to work with the hardware. However, Linux does have its own native software for writing to PCMCIA cards and I think that it might work for the linear cards used for the samples.


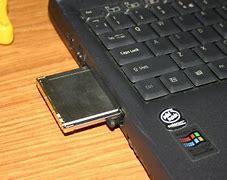
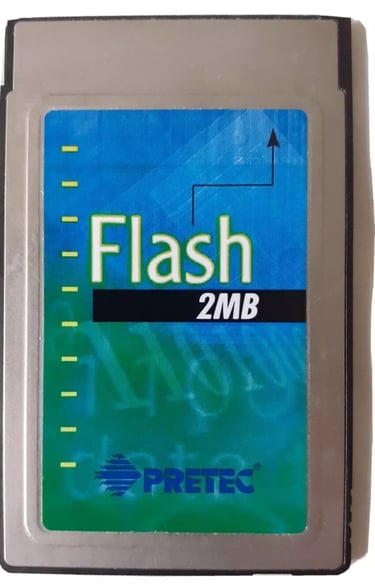
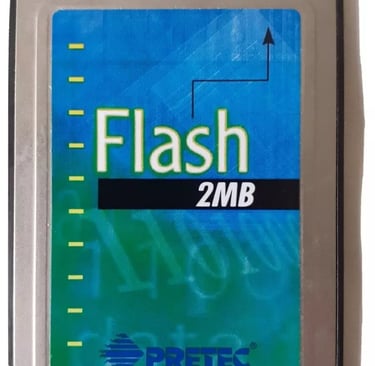
2) A PCMCIA Linear flash card
Notes: This is not a standard PCMCIA memory card. It must be a linear flash card.
Ideally it should be 2MB as this is the maximum size for the Wavestation SR (I have used 4MB and they still seem to work, but I'd probably recommend a 2MB one.
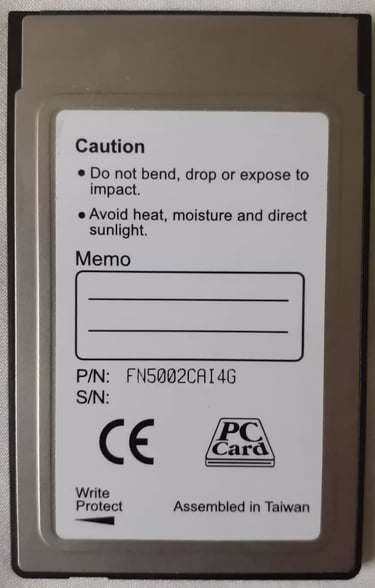
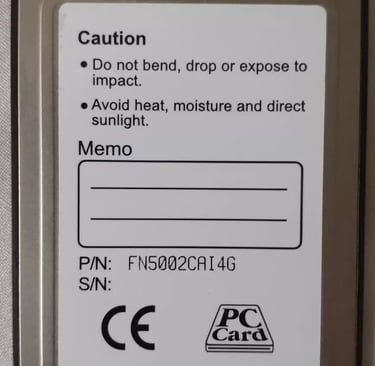
The card should have no attribute memory. Note: I had one card that did have attribute memory and managed to disable it by taking the card apart and internally disconnecting the attribute pin (pretty horrible job though). Note: the N in the P/N section on the back of the card seems to indicate No attribute memory.
3) PCM Card Workshop By Mike Werning
This is the software use to convert the samples to a binary file, suitable for transferring to the PCMCIA linear flash card. More details of this will be given later on.
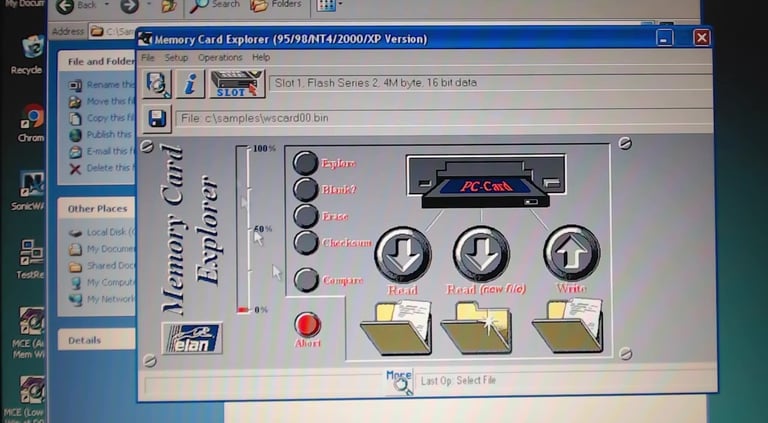
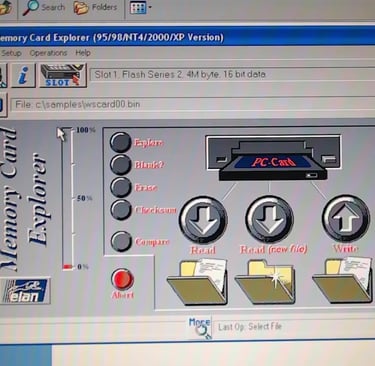
4) Memory Card Explorer (MCE) by Elan
This is the software use to write the binary file produced by PCM Card Workshop to the linear flash card. Note you will also need an XP machine with an internal PCMCIA slot to read and write the cards. More details of the process will be given later on.

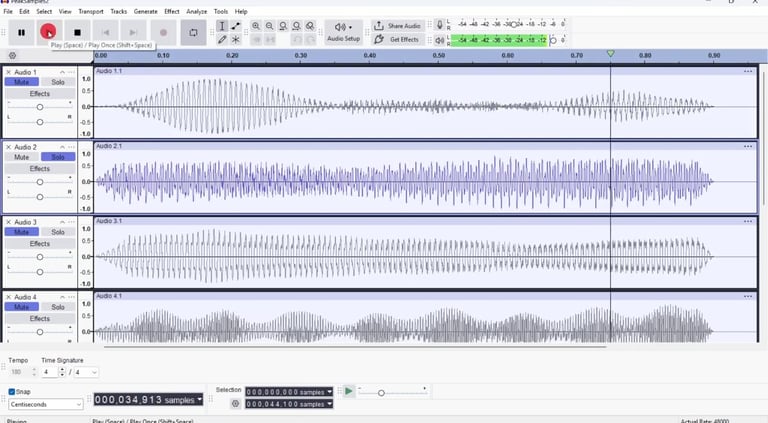
5) Audio file manipulation software (I used Audacity)
I used Audacity to record samples from a Novation Peak synthesizer and then convert them to the required format for the PCM card writing process (outlined later on). Note that you could alternativley download some samples, but will still possibly have to go through some form of conversion process.
Preparing the Samples
I decided to record some of my own samples from a Novation Peak into Audacity, and then manipulate them so they were in the right format, and better for loading onto the linear flash card. You could download samples but they may still need to be changed to the correct format.
Some notes:
The final PCM card will allow a maximum of 33 seconds of samples: I decided to initially have each of my samples 1 second long (you will obviously be able to have far more samples if you use single cycle ones).
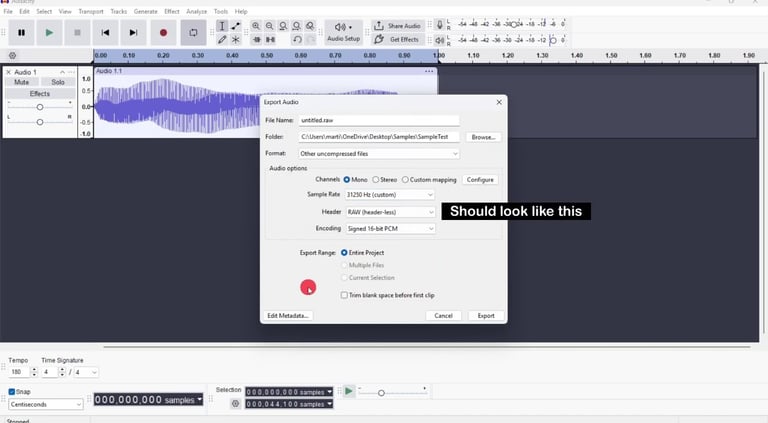
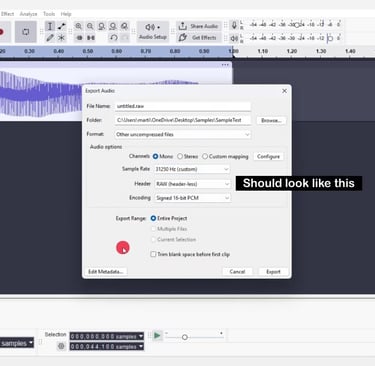
The final audio files need to be exported from Audacity in the following format. (using the Audacity File -> Export dialogue)
Sample Rate; 31250 Hz (custom): you will have to change this manually.
Header; RAW (header-less):
Encoding; Signed 16-bit PCM:
Also if you've got multiple files in the project you need to check the 'Multiple Files' option.
When exporting it should look something like the following.
Recording the samples
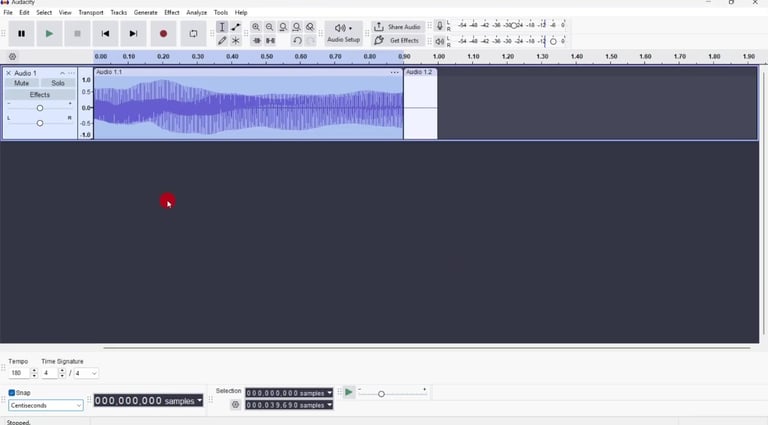
Note: Prior to recording the samples, I set Audacity to record in single channel / mono mode.
I initially set up the recording levels, then armed audacity to start recording on note detection.
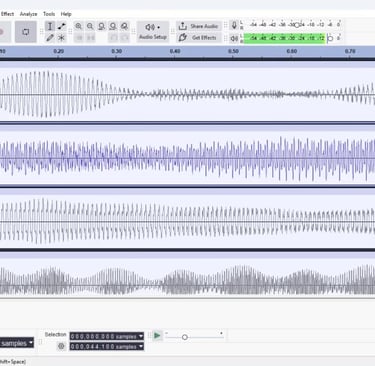
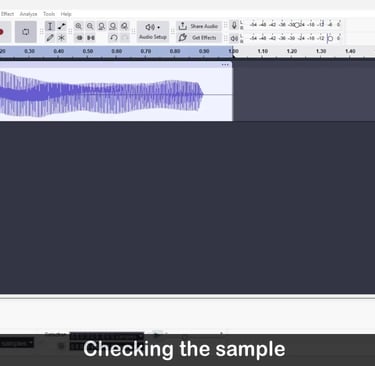
All samples were were recorded as C4.
All samples were recorded for more than 1 second.
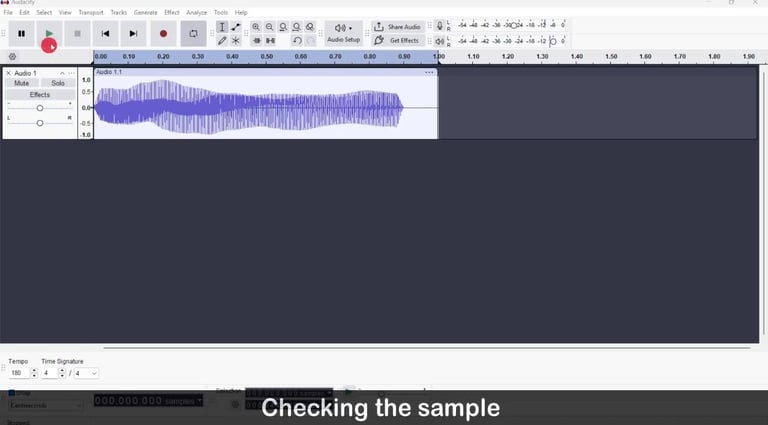
After recording the sample I did the following......
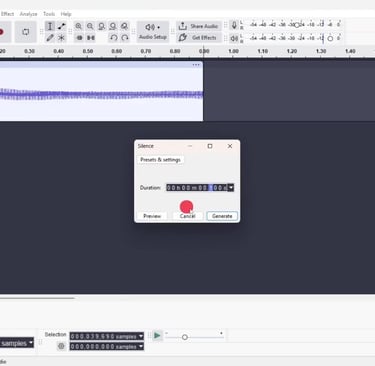
1) Truncated the sample to 0.9 seconds long so that I could add 0.1 second of silence at the end (for looping)
2) Normalised the main sample.
3) Added fade ins and fade outs to the sample.
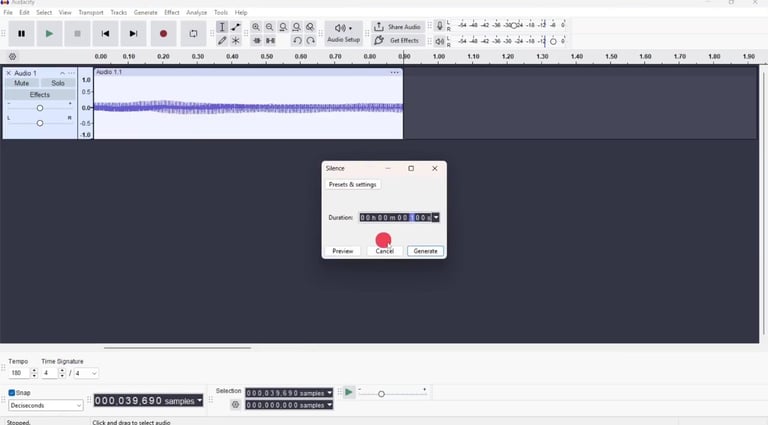
4) Used 'Generate -> Silence' to append 0.1 seconds of silence.
5) Used 'Edit -> join' to merge the main sample and the silence.
6) Finally used 'File -> Export' to export the audio in the correct format.
Preparing PCM Card Workshop file and converting PCM waves to binary
The next stage involved using the PCM card Workshop software to generated a binary file suitable for writing to the Linear flash card.
This required the following steps to be carried out......
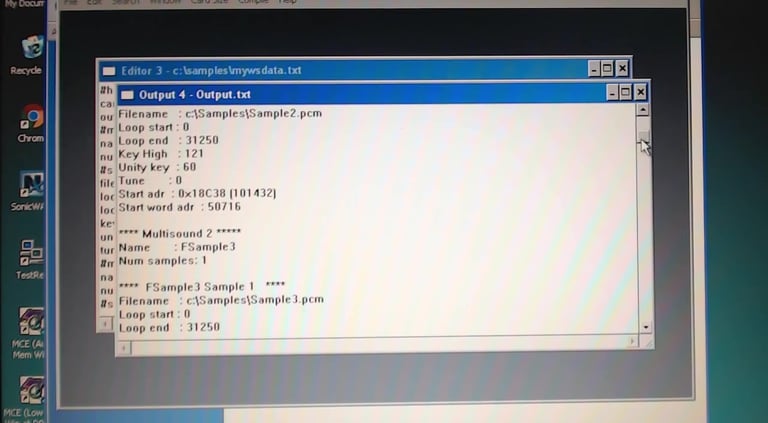
1) Generation of a text based compiler file, that instructs the software where to find the PCM files and what to do with them. The file format is outlined below.
2) using the software to read the files and create the binary file.
Outline of the compiler file
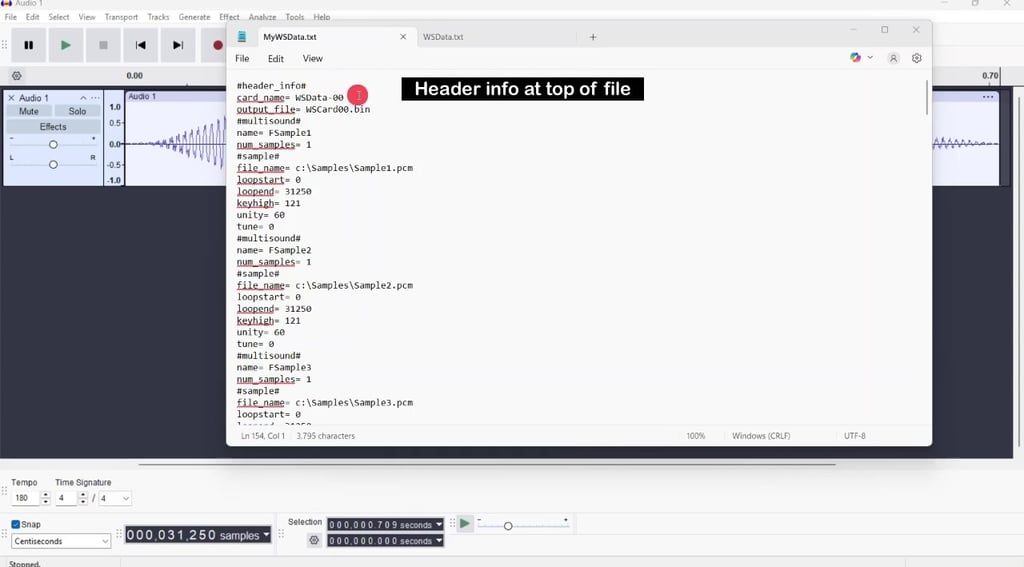
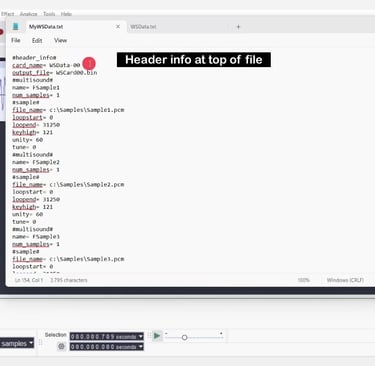
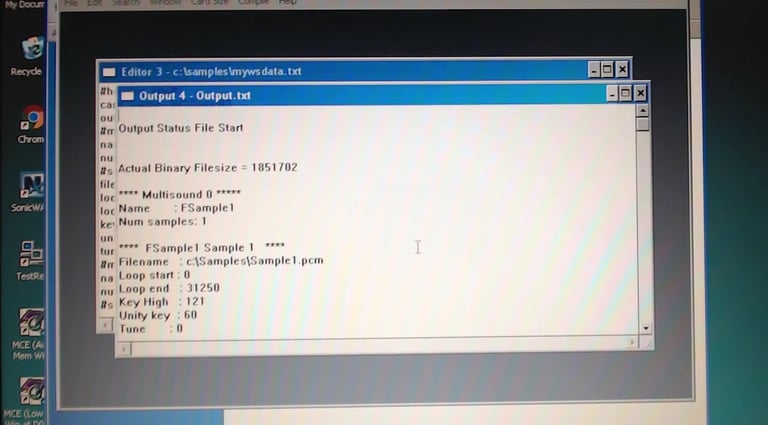
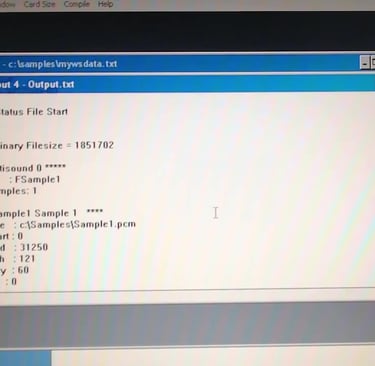
The top 3 lines of the file contain the header info.
Note: I think the filenames etc can be a maximum of 11 characters long.
The 'card name' is the name that will be written to the final card.
The 'output file' is the name of the generated binary file for writing to the card.
After that the information for the samples is included.
Each sample or set of samples will have the following format (note drum samples are different but I haven't looked at them yet) my comments are between /**/
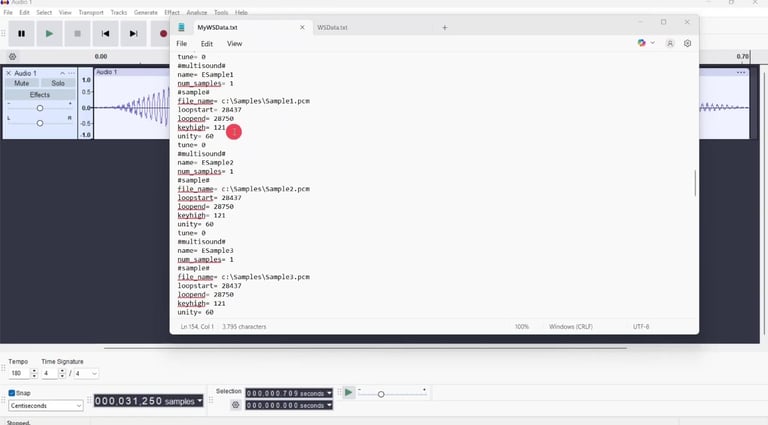
#multisound# /*used to indicate the start of a sample or set of samples */
name /* The name that you want the sample to be called on the final card and the Wavestation */
num_samples /* the number of samples in this particular multisound (Note the multisound could have a single sample e.g. one sample spread across the whole keyboard as shown in the example. Or multiple samples i.e. a few samples of the same sound at different notes per octave. This would, I think allow better mapping of a sound across a keyboard. i.e. minimize it speeding up or slowing down. Alternatively you could have different sounds spread across the keyboard. In the example shown only one sample is being used. */
#Sample# /* Start of each sample in the multisound */
file_name /* filename and path where you are going to put the raw samples. Note this will be on the XP machine. I decided to keep it simple and set up a directory called 'Samples' on the C drive of my XP machine. */
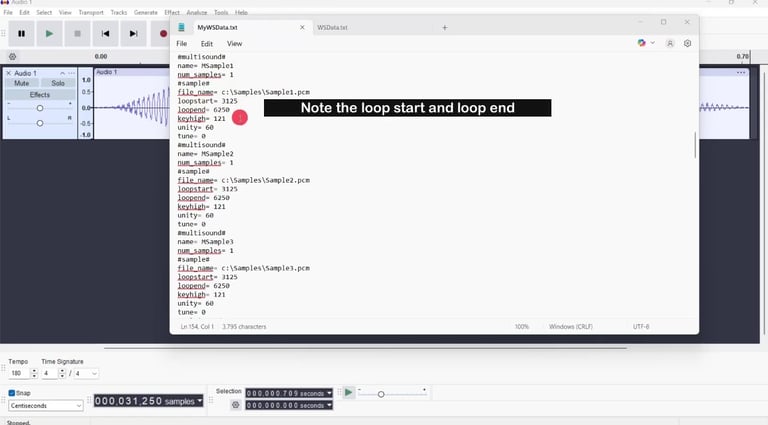
loopstart /* Where the sample will start looping when it is played */
loopend /* Where the sample will end looping when it is played */
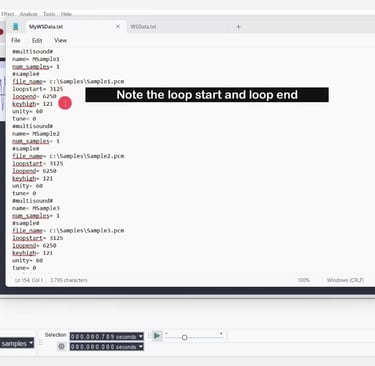
Note: in the example loopstart = 0 and loopend =31250. This means that the whole sample will be looped continuously for my 1 second of sample. You can also loop the sample anywhere within it. For example for the 31250 samples over 1 second , loopstart = 15625 would indicate that the loop would start at 0.5 seconds and loopend = 23437 would indicate that the loop would end at 0.75 seconds. You have to be careful with this though. If the end and start points don't have smooth transition you can end up with artifacts in the sound (switching clicks). This was evident in the video I did because I only selected the loop points arbitrarily.
In the samples I created I added 0.1 seconds of silence at the end. If you loop the sample in the silent area you can get it to play only once per key press. I think that you need to loop over at least 10 samples. For my setup the sample range for the silence starts at 0.9*31250 = 28125 and ends at the end of the sample, i.e. 31250. You would want to perhaps loop close to the start to prevent too much end silence.
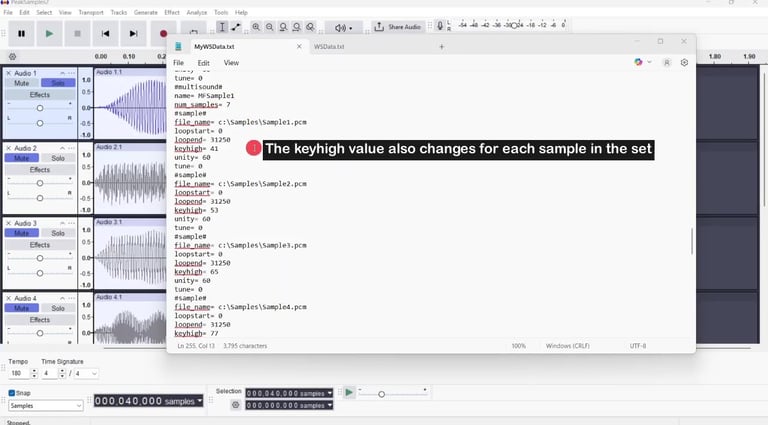
keyhigh /* This is the highest keyboard note that will play the key. In the example I've set a high value as I want the sample to play over the entire keyboard (note I think 127 is the actual highest value)( Note versus numbers is shown later). */
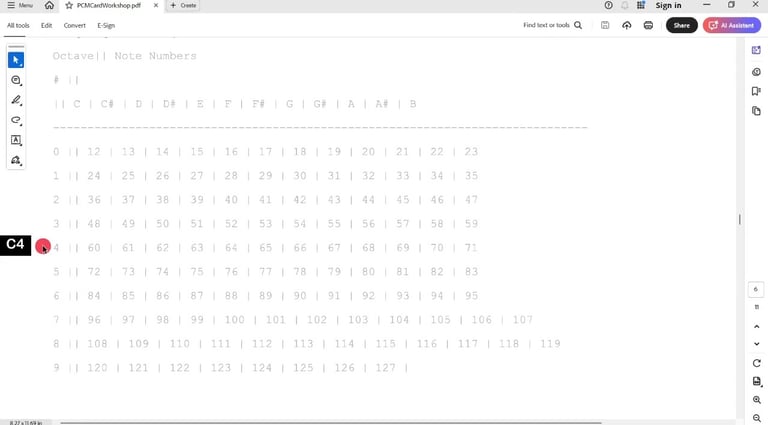
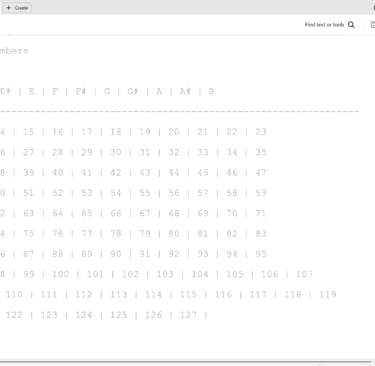
unity /* This is the value that the note/sample was recorded at. In this case I recorded C4. A table below shows the unity values versus notes */
tune /* I think this value allows you to detune in cents. I didn't use it, as I tried to make all my samples a C4 note.
So the above will represent a multisound set. Other sets are added in the same format.
The following pictures show file structures for samples looping within the sample (not going to the ends), samples looping in the silent portion and a multisound using more than one sample. A note value versus note number table is also shown.

Making the Binary file
To make the binary file I did the following:
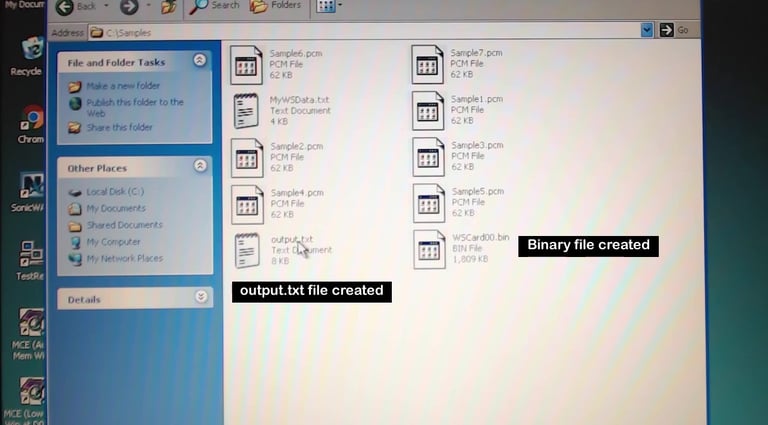
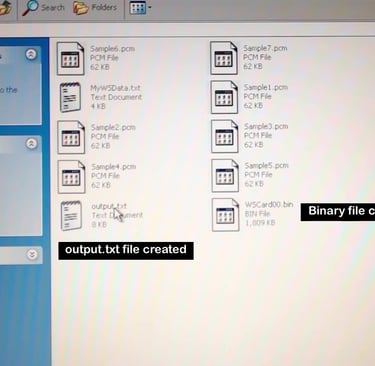
1) Transferred the sample files and the compiler file to a top level directory called 'Samples' on my XP machine.
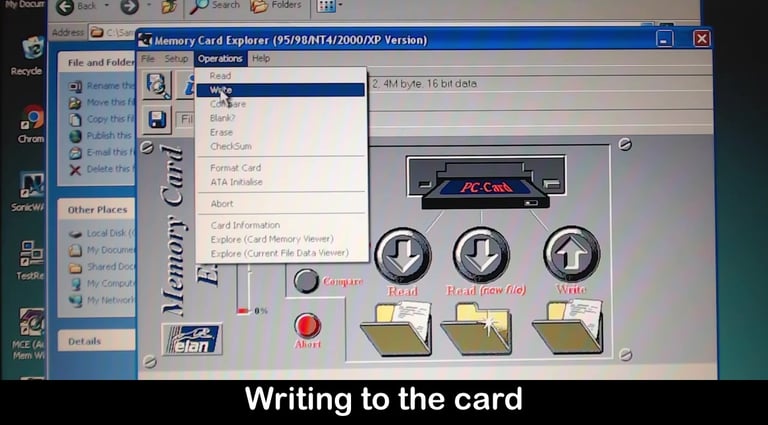
2) Started memory card explorer.
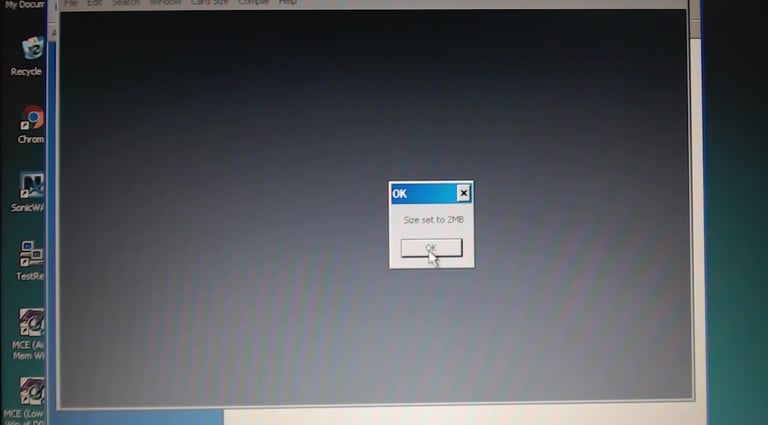
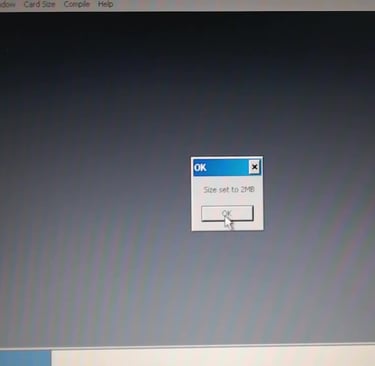
3) Set the memory card size - in my case it was 2MB.
4) Selected 'Execute' and then located the compiler file when prompted.
5) The file should compile automatically (if there are no errors in it).
6) The resulting *.bin file should appear in the 'samples' directory along with a file called output.txt.
You need the *.bin file to write to the card using Memory Card Explorer.
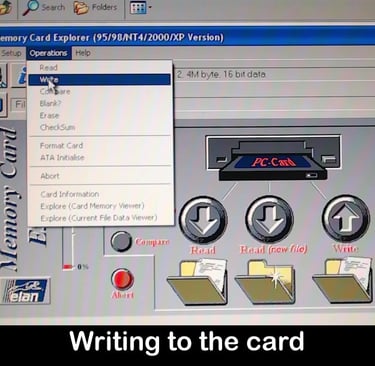
Writing to the card using Memory card explorer
To write the binary file onto the linear flash card I did the following:
1) Inserted the card into the PCMCIA slot.
2) Started Memory Card Explorer.
3) The card should be detected.
4) Select the binary file and the select 'Write'. Note I erased the card before writing. But I think it possibly automatically erases when writing.
5) After writing and checking has completed the card should be ready for use in the Wavestation SR.
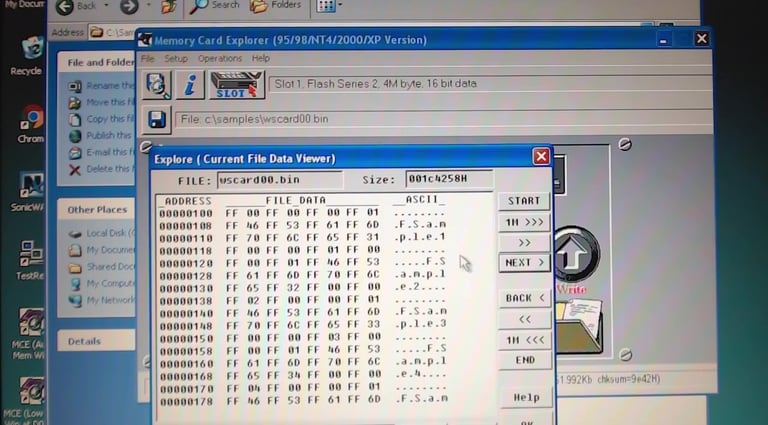
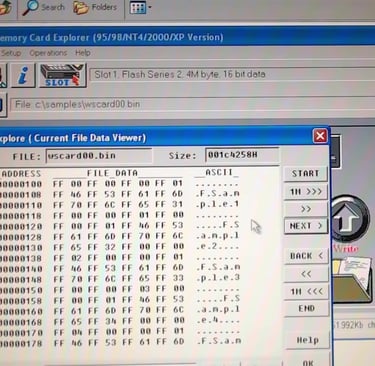
Note: If you need to you can also view the contents of the binary file using MCE, although software such as Hexedit may be more useful.

Finally trying out on the Wavestation SR
The only problem I had with using the card was actually finding the files at first. (Even though I'd done it before, it's such a convoluted process, I'd forgotten how to do it !)... Anyway, I found that the best description of how to access the files and use them was in the 'Wavestation SR Player's Guide by Dan Phillips'. You need to look at chapter 9 'Patch Tour'. All of the chapter is useful, but 9.3. is the most important part.
Downloads | WAVESTATION SR - Player's Guide | KORG (USA)
After looking at the manual I did the following:
1) Selected a performance - I think it was the second one 'Pinger ?'
2) Pressed edit and then cursored left to go to the 'solo part' command then pressed +yes.
3) I think I also set the oscillator structure to a single oscillator somewhere in 'Patch', but I cant remember where, although it should be at the end of the video.
4) Cursored back to 'PATCH' on this page and pressed PAGE+ once to go to the 'WAVES' page. I think you should then be able to use the 'Bank' button to select bank C , where C indicates the Card.
5) After all that, you should then be able to scroll through the samples on the card using the +yes and -no buttons. You should also be able to play the samples.
The video linked below shows the process of writing the card, and also has some sound demos of the samples at the end (you should see where they are on the timeline).
Anyway, I hope the description has been OK. Please try and watch some of my videos and like and subscribe on my YouTube channel. Also let me know if you want WS SR cards doing, or the program files making available as a pack, or if anyone is interested in a card programming service.

Help me proceed with anything on this site.
If you like what I'm doing, please feel free to support me and keep this site alive.